How to: Create a reverb send in Protools
When I am recording I always have the need to add a little bit of reverb to certain tracks such as the snare drum and the vocal tracks. I don’t want to add an individual reverb plug in to every track as it will use up to much processing power so a great way to do it is to use sends. Here is my little handy guide on how to do that. I created it as a reminder and quick reference for myself but if you come across it and find it useful then brilliant!
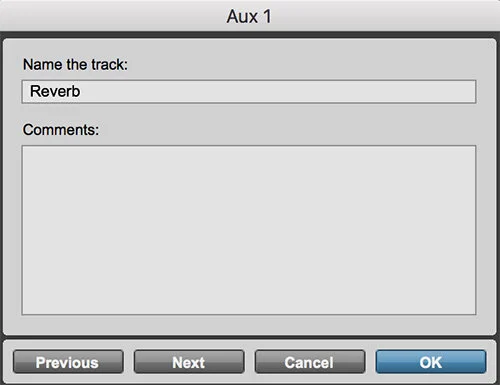
First create a stereo Aux Input track by going up to the Track menu and choosing New…
Make sure you select Stereo and Aux Input. Once the new track is created I have it at the end of the row of faders and just before the master fader. To rename it just double click on the track name.
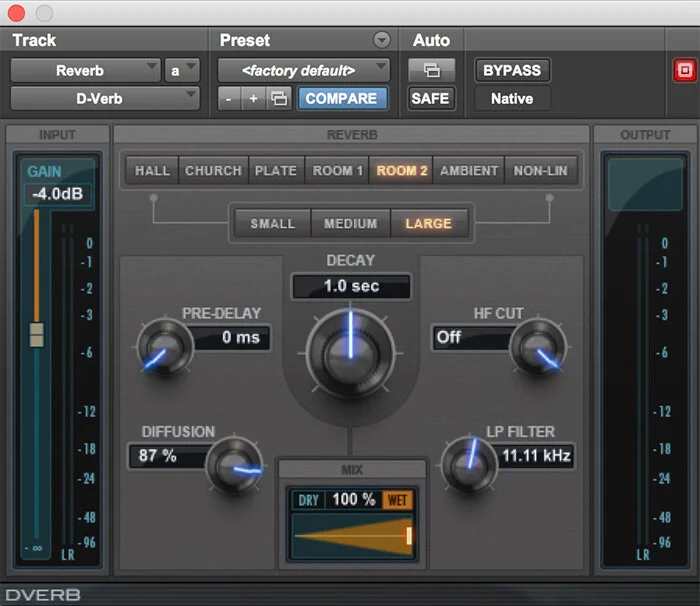
Now that the Reverb Aux Input track is created add a reverb plug in to the track. I use D-verb which comes with ProTools:
The D-Verb plug in is pretty cool. Here are my settings:
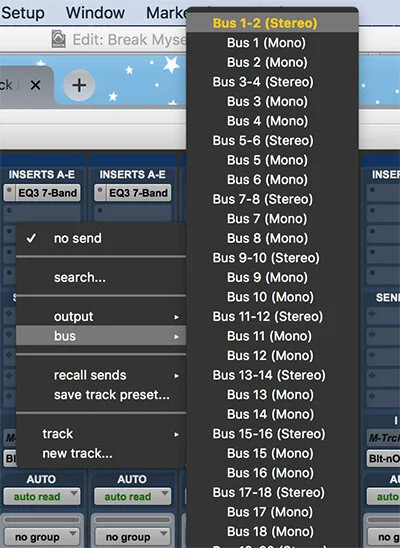
The next mission is to add a send to the snare drum track. To do that click on sends in the fader strip and choose a stereo bus. A bus is a way of sending a signal. Send your snare drum on the bus to reverbsville! Choose the first available stereo bus. If you haven’t created sends in your mix already than that will be Bus 1-2
Next go the new Reverb track and click on input so that you can receive the bus and select Bus 1-2:
At this point a new fader strip appears and if you play your song you can slide up this new fader to add the reverb to the snare. Brilliant! One thing to realise though is that if you use the same technique to send a vocal track to the reverb aux it is that same new fader strip that you use for both and you will need to switch around the setting of the new reverb fader depending on which track you wish to add the effect to.
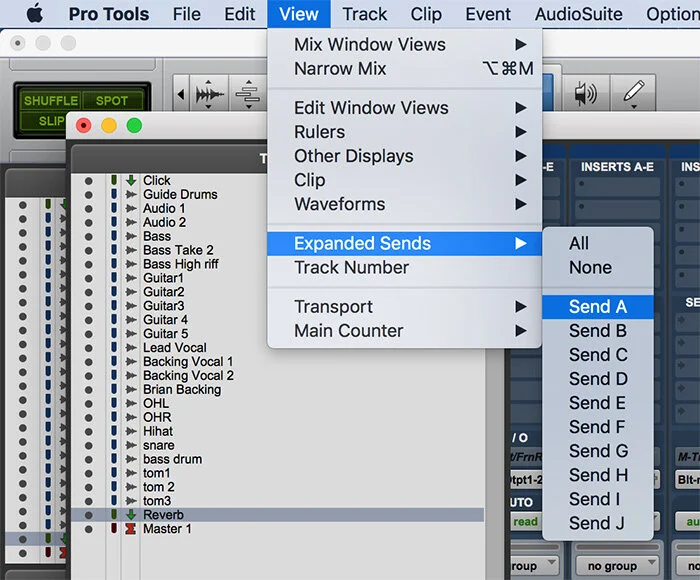
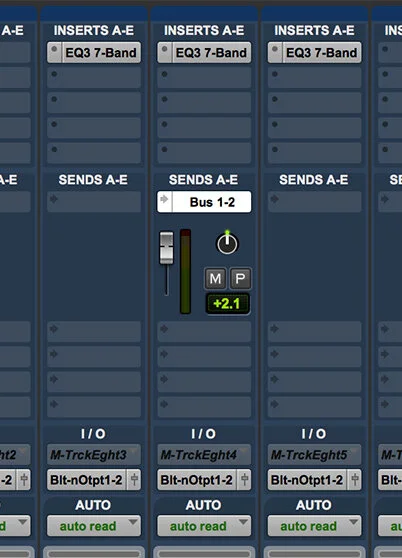
A better way to do it is to add a little fader on your snare and vocal track. So one last little mission is to go up to the View Menu>Expanded Sends>Send A
You then end up with a little fader right in the snare track (and any other track with sends) like this:
Pretty cool right!
Notice the two buttons. M is for mute and P stands for pre or post fader. By default it is set to post fader and that is the setting to leave it at as it allows the reverb volume to change with the track volume.
Hope you found that useful.
Written and published by
Steve Hogg
25 March 2020


